Hello, welcome to today’s new guide. Today we will learn How to Screen Record on the Samsung Galaxy F41.
So, if you are looking for a guide on how to Record Screens in Samsung F41 then you have come to the right place.
Screen recording can be a very useful feature to perform a tutorial or to show to your friends.
Record the screen and save it, then send it or upload it on a platform like social media.
Currently, this setting is only available on select Samsung smartphones running on One UI 2 and Android (Q).
Now let’s know How to Record the Screen in Samsung Galaxy F41 with the help of this step-by-step guide.
So without wasting any more time let’s jump to the post…!
How To Screen Record on Samsung Galaxy F41
In this depth guide, I have shown you two ways to successfully record the screen in the Samsung Galaxy F41.
The reason behind me sharing two methods is that if one of any methods fails then you have another option.
![]()
METHOD #1: Screen Record on Galaxy F41 With Screen Record Icon
- First, swipe down from the top of your Galaxy F41 screen and open the Quick Panel (Notification Panel).
- Then select the Screen Recorder Icon, if you want to change the quality of the recording, long-press the screen recorder icon.
- Now you can select your preferred Sound settings like No sound, Media Sound, Media sounds, and mic.
- Then tap on the Start recording
- That’s It 🙂
Now the screen recording will start on your phone and you will see a countdown clock, along with many options at the top of your screen such as the pen tool to make pictures, enable or disable the picture-in-picture feature and when your screen recording is finished, just tap on the stop icon button.
Must See: How to Screen Record on Samsung Galaxy A32?
If the screen record icon is not visible in your Quick Panel?
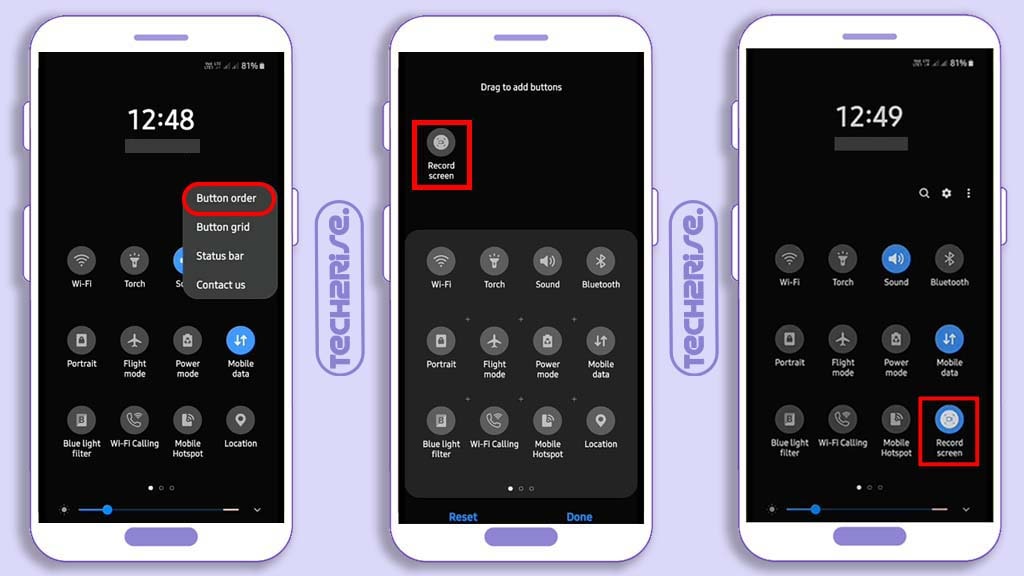
- Click on the three-dot vertical icon at the top right corner of the Quick Panel.
- Then Tap on the ”Button Order”
- Now you will see the Record Screen Icon, drag it in the icon button section to include it in the Quick Access panel.
- That’s It 🙂 Enjoy…!
If the screen record icon is still not visible then you can try the second method to record the screen on Galaxy F41.
Because on older Samsung devices, the inbuilt screen recording option is not provided, so we have to download a third-party application for screen recording.
Must Read: How to Screen Record on Galaxy A21S?
METHOD #2: How to Record Screen on Galaxy F41 Using Screen Recording App
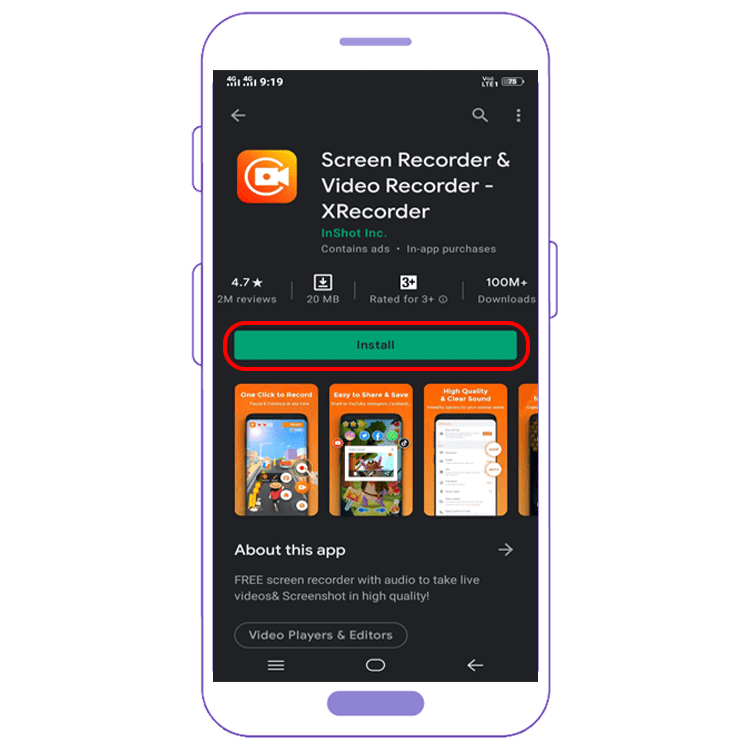
- First, open your Play Store and search XRecorder.
- Then click on the Install button and open it.
- Now Start Screen Recording
- That’s It 🙂
Sometimes the screen record icon will be available in the notification panel when you install it. Also, you can record the screen manually by opening this app.
Read Here: Take a Screenshot on Samsung F41?
Related Articles YOU MAY ALOS LIKE:
- How to Record Screen in Samsung M21?
- Screen Record On Galaxy M31?
- Record Screen In Samsung A21?
- How To Screen Record On Galaxy F62?
Wrapping Up:
So this Step-by-step article was about How to Screen Record On Samsung Galaxy F41?
I hope you find this article useful and good! You can see more similar Screen Record guides from here.
Which method would you like to try first?
If you have any questions related to this article, then you can ask me in the comment section, I will definitely reply to your comment.
Don’t forget to subscribe to our newsletter to get new updates related to the posts.
Thanks 🙂 for reading this article till the end…!


![How to Screen Record On Samsung Galaxy Tab A8 10.5 [2 EASY WAYS]](https://tech2rise.com/wp-content/uploads/2022/02/How-to-Screen-Record-On-Samsung-Galaxy-Tab-A8-10.5-250x150.jpg)